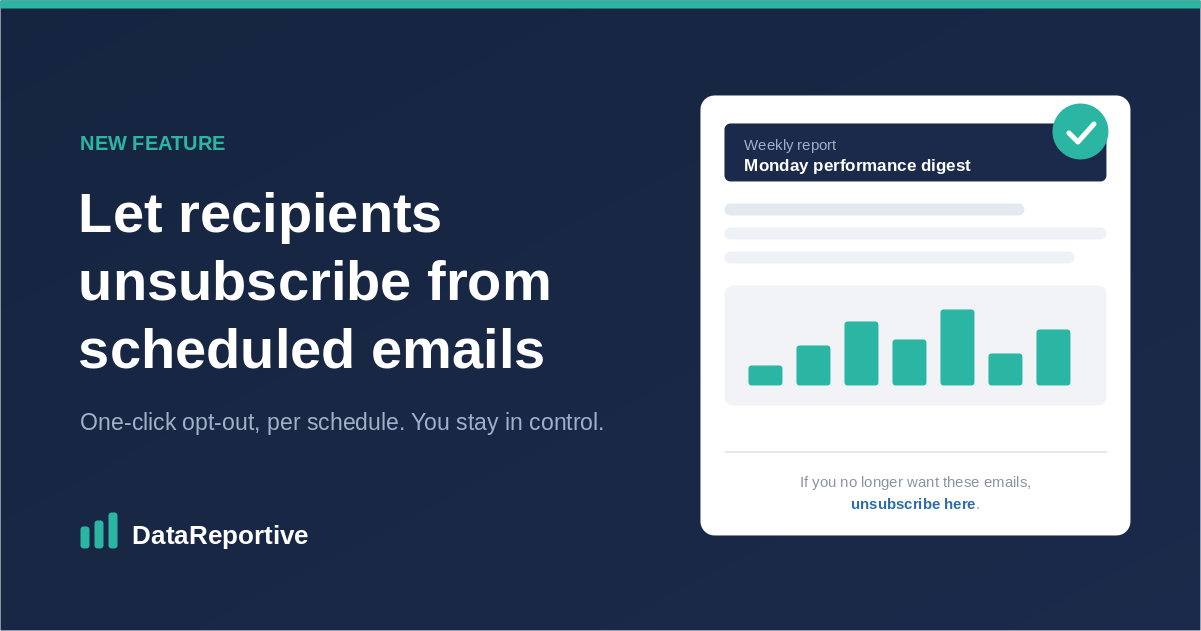
You can now offer a one-click unsubscribe link on any email schedule. Each recipient gets their own personal link, and when they use it they stop receiving that schedule only, not every email from your organisation. You stay in control: you can see who has opted out and bring them back when you need to.
If you send recurring reports by email, this closes a small but awkward gap. Until now, a recipient who wanted off a weekly digest had to email someone and ask. Now they can opt out themselves, from the email, in one click.
Why add an unsubscribe link?
Recurring email is the right format for a lot of reporting, but a mailing list that nobody can leave creates friction and complaints. An unsubscribe link gives recipients a polite, professional way out, reduces the support requests that land in your inbox, and keeps your scheduled email reports looking like considered communications rather than spam.
The key detail is that unsubscribes are per schedule. Opting out of one mailing does not affect any other schedule the same person is on, so a recipient can leave the weekly digest while still receiving the monthly board pack.
Who uses this, and when
Weekly report digests. Let readers drop off a recurring summary without a back-and-forth with your team.
Newsletter-style HTML emails. If you send designed HTML reports to a wider audience, a footer unsubscribe link is what people expect and look for.
Scheduled PDF or dashboard deliveries. Attach a short message with an opt-out line so recipients of a scheduled PDF can step away cleanly.
For one-off internal sends to a small, known group, you may not need it at all. It is most useful where the audience is larger or changes over time.
What you can do
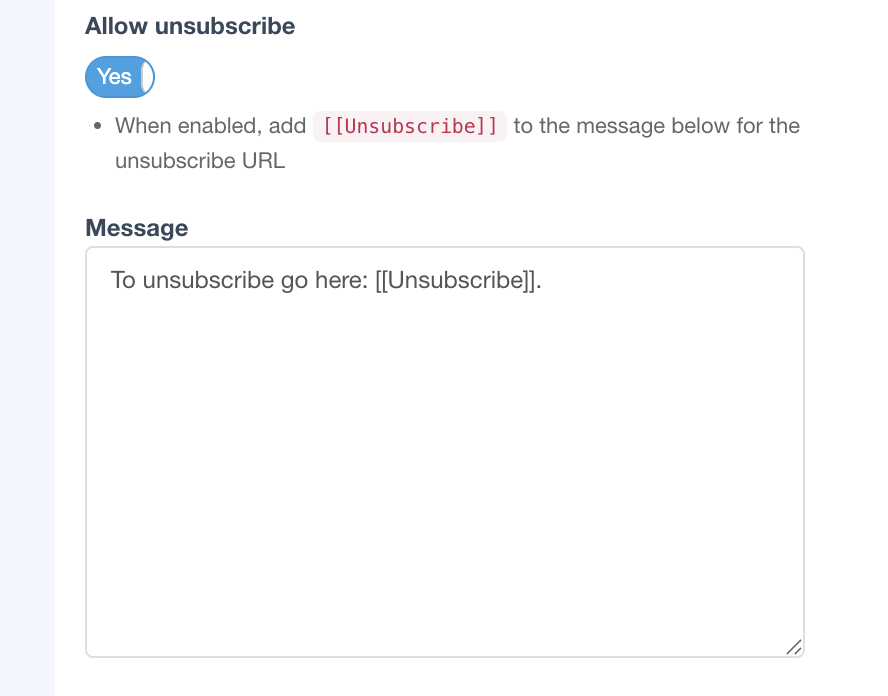
- Turn on Allow unsubscribe per email schedule.
- Add an
[[Unsubscribe]]placeholder to the email message or the HTML email design. - Give each recipient their own secure, personal unsubscribe URL.
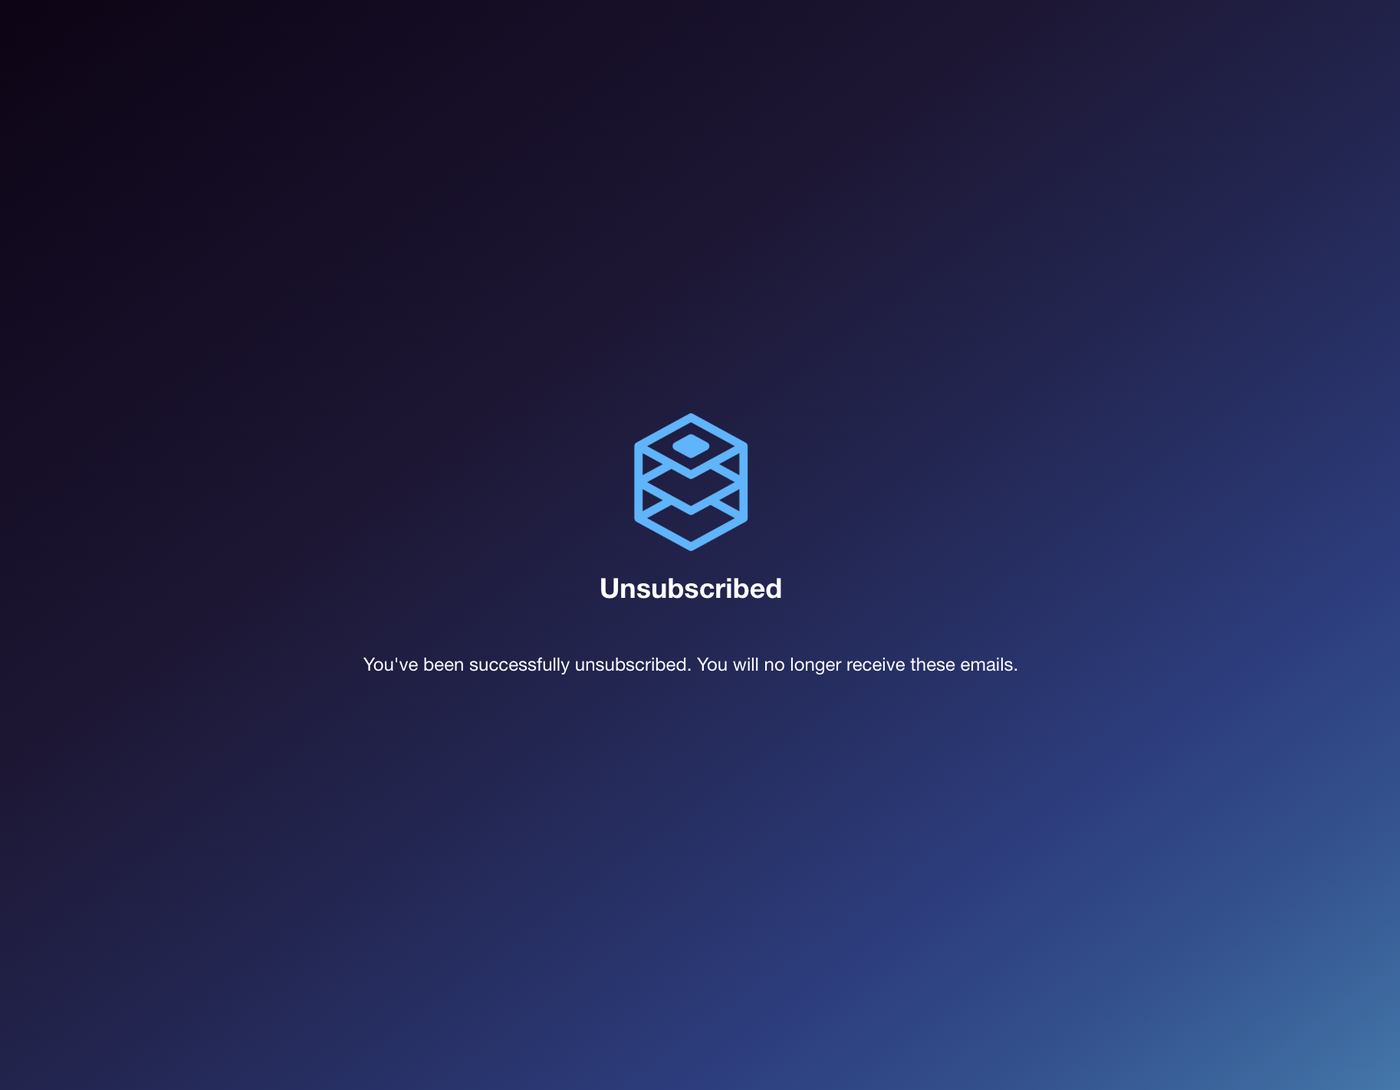
- Show a branded confirmation page with your logo after they opt out.
- Review and manage unsubscribed recipients from the schedule page.
- Customise the confirmation message and background colour in Settings.
How to turn it on
You need admin access to the schedule, and the schedule must use Email as the delivery method. Unsubscribe is not available for Slack schedules.
1. Enable unsubscribe on the schedule. Open Schedules and create or edit an email schedule. Set up your report, recipients and subject as usual, switch Allow unsubscribe to Yes, then save. If unsubscribe is off, any [[Unsubscribe]] placeholder is removed before sending, so nothing broken goes out.
2. Add the unsubscribe placeholder. Where it goes depends on the report type.
For reports and dashboards (PDF, PNG and similar), add the placeholder in the schedule Message field. A plain text line works:
To stop receiving this email, unsubscribe here: [[Unsubscribe]]Or use HTML and put the placeholder in the link href with your own link text:
<p style="font-size: 12px; color: #666;">
  If you no longer wish to receive this email,
  <a href="[[Unsubscribe]]">unsubscribe here</a>.
</p>
For HTML email reports, the content comes from the email design in the report editor, not the schedule Message field. Open the email report in the editor, add the link in a footer or other block, save the report, then save the schedule:
<p style="text-align: center; font-size: 12px; color: #888;">
  <a href="[[Unsubscribe]]">Unsubscribe</a> from this mailing list.
</p>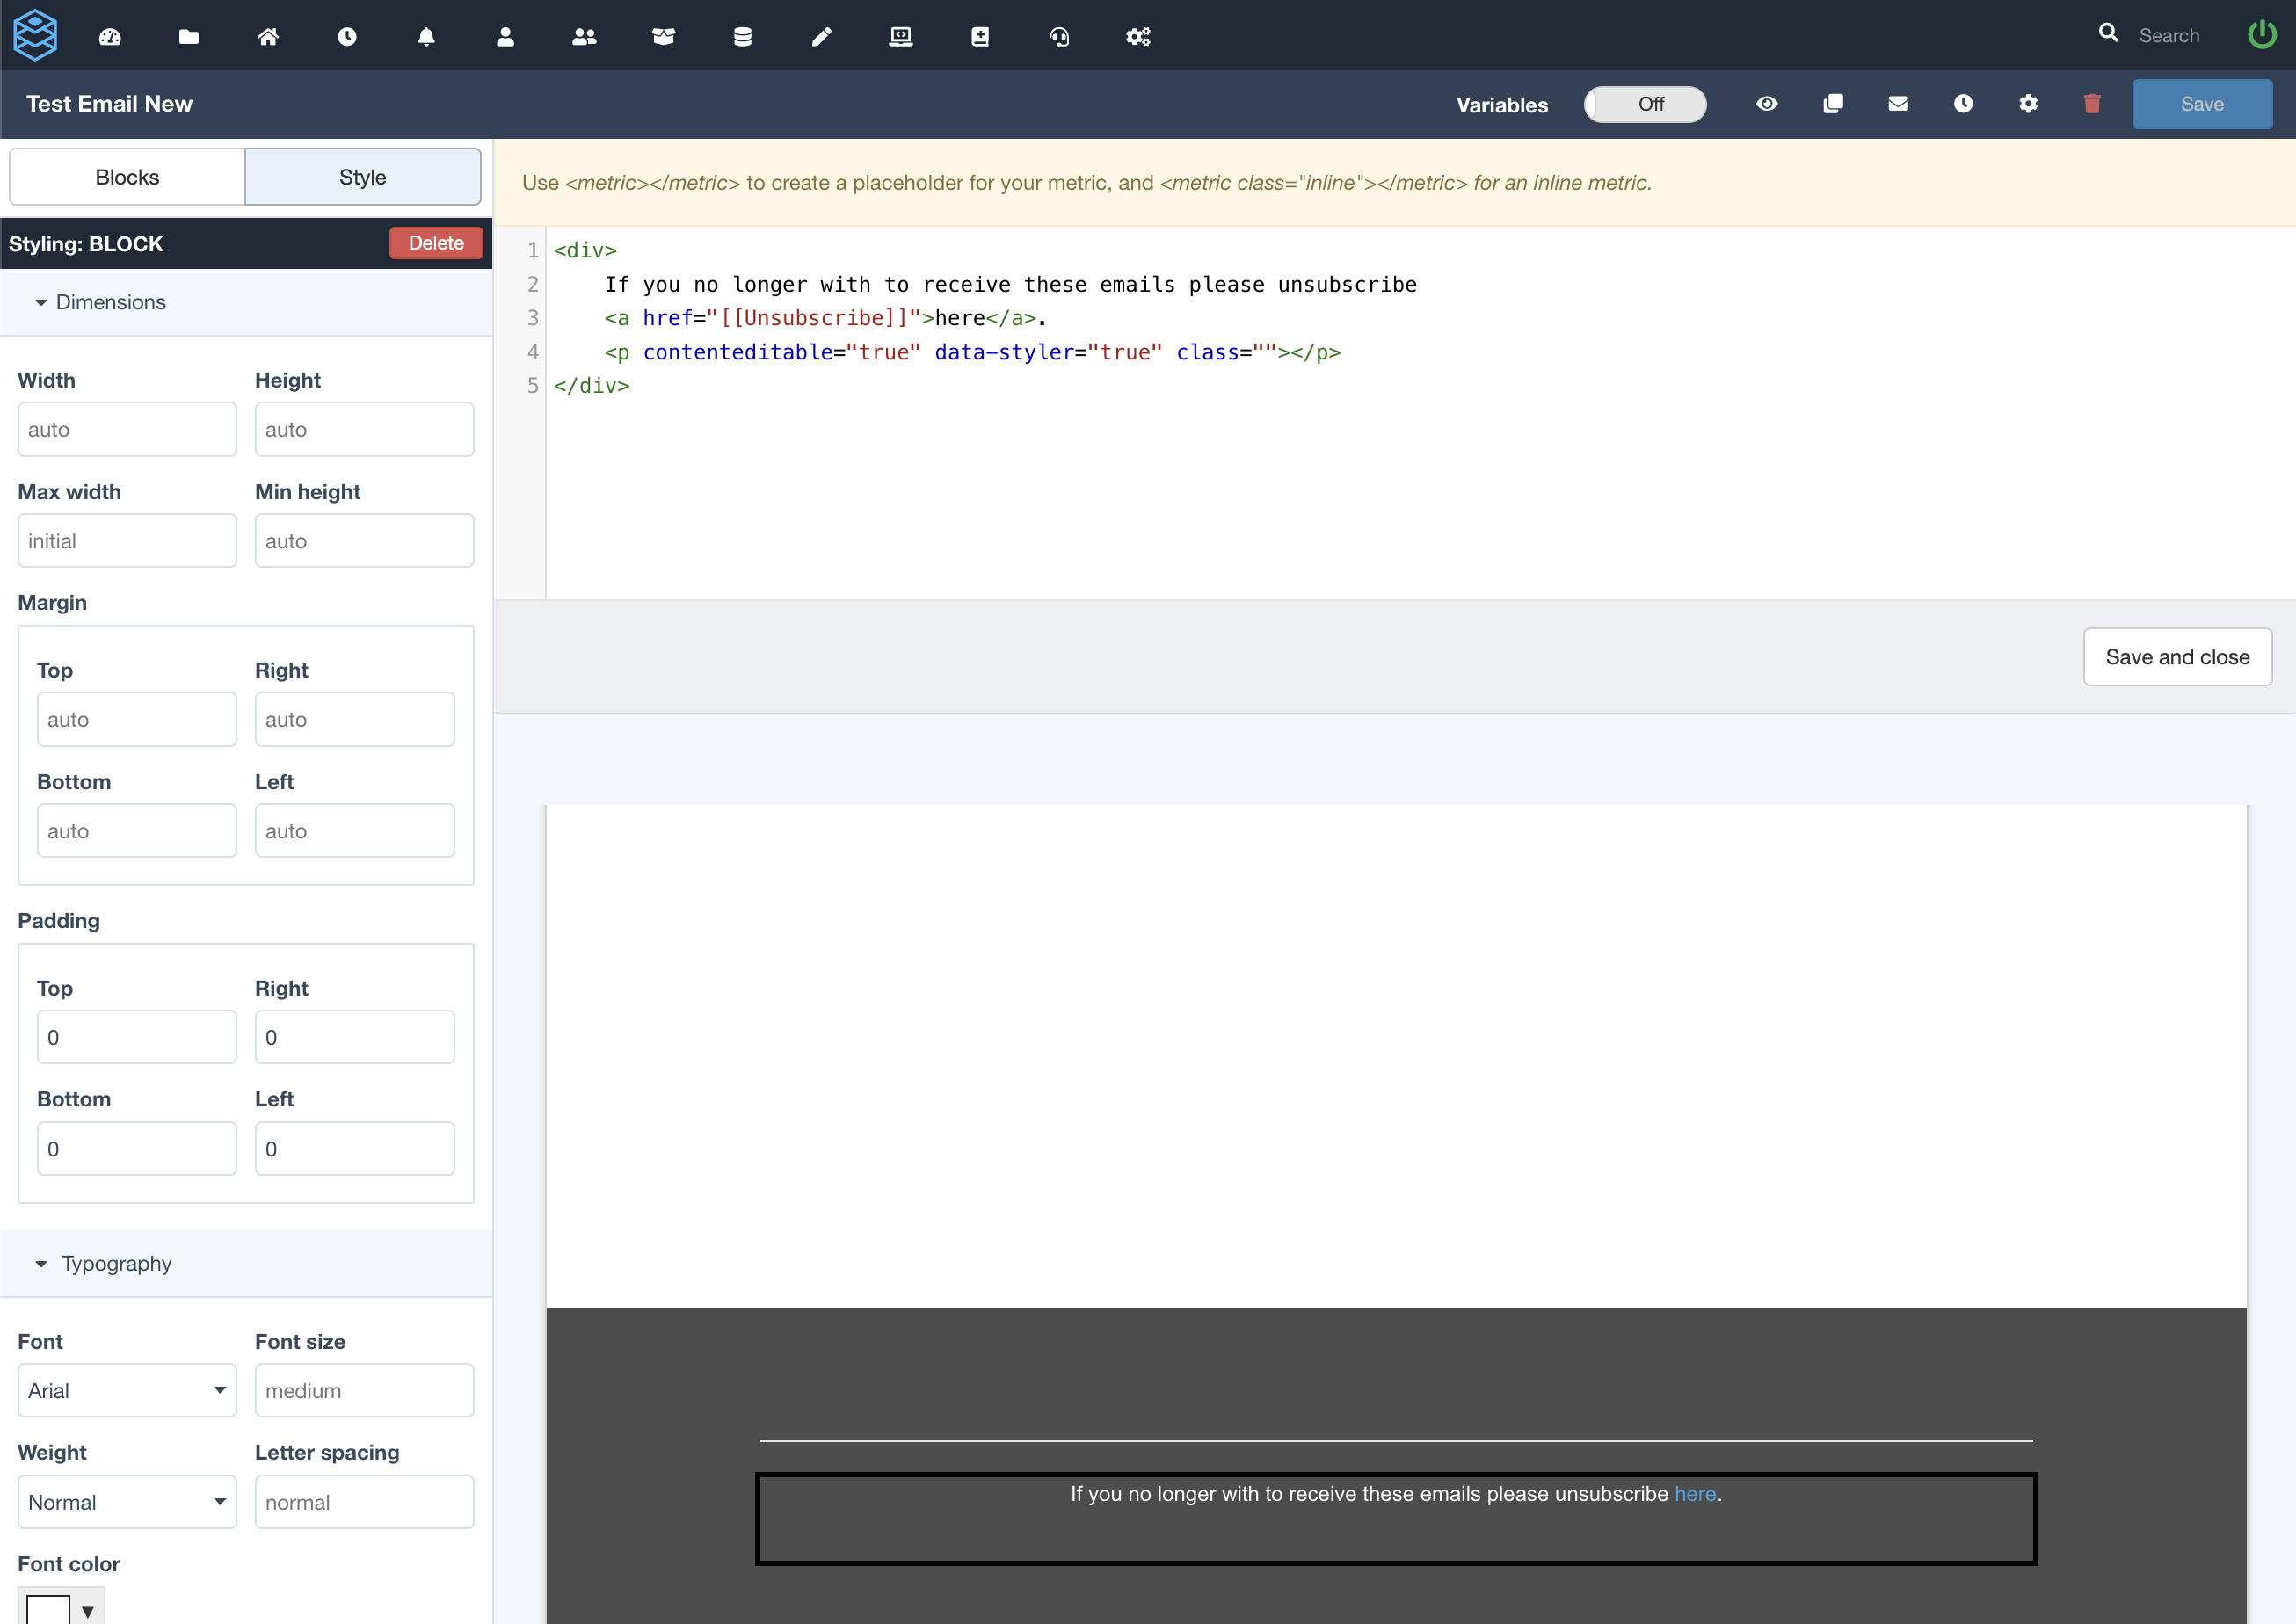
3. Send and test. Add yourself or a test user as a recipient, run the schedule manually or wait for the next send, and confirm the link appears. Click it, and you should see the confirmation page straight away with no login required. Send again, and the address that opted out will be skipped.
What recipients experience
Recipients get the scheduled email as usual. They click the unsubscribe link, with no DataReportive account needed, and see your branded confirmation page right away. From that point they stop receiving that schedule only.
Managing unsubscribed recipients
On the schedule page, and when editing the schedule, expand Unsubscribed recipients to see who has opted out. You can remove one person or clear the whole list so they can be added as recipients again.
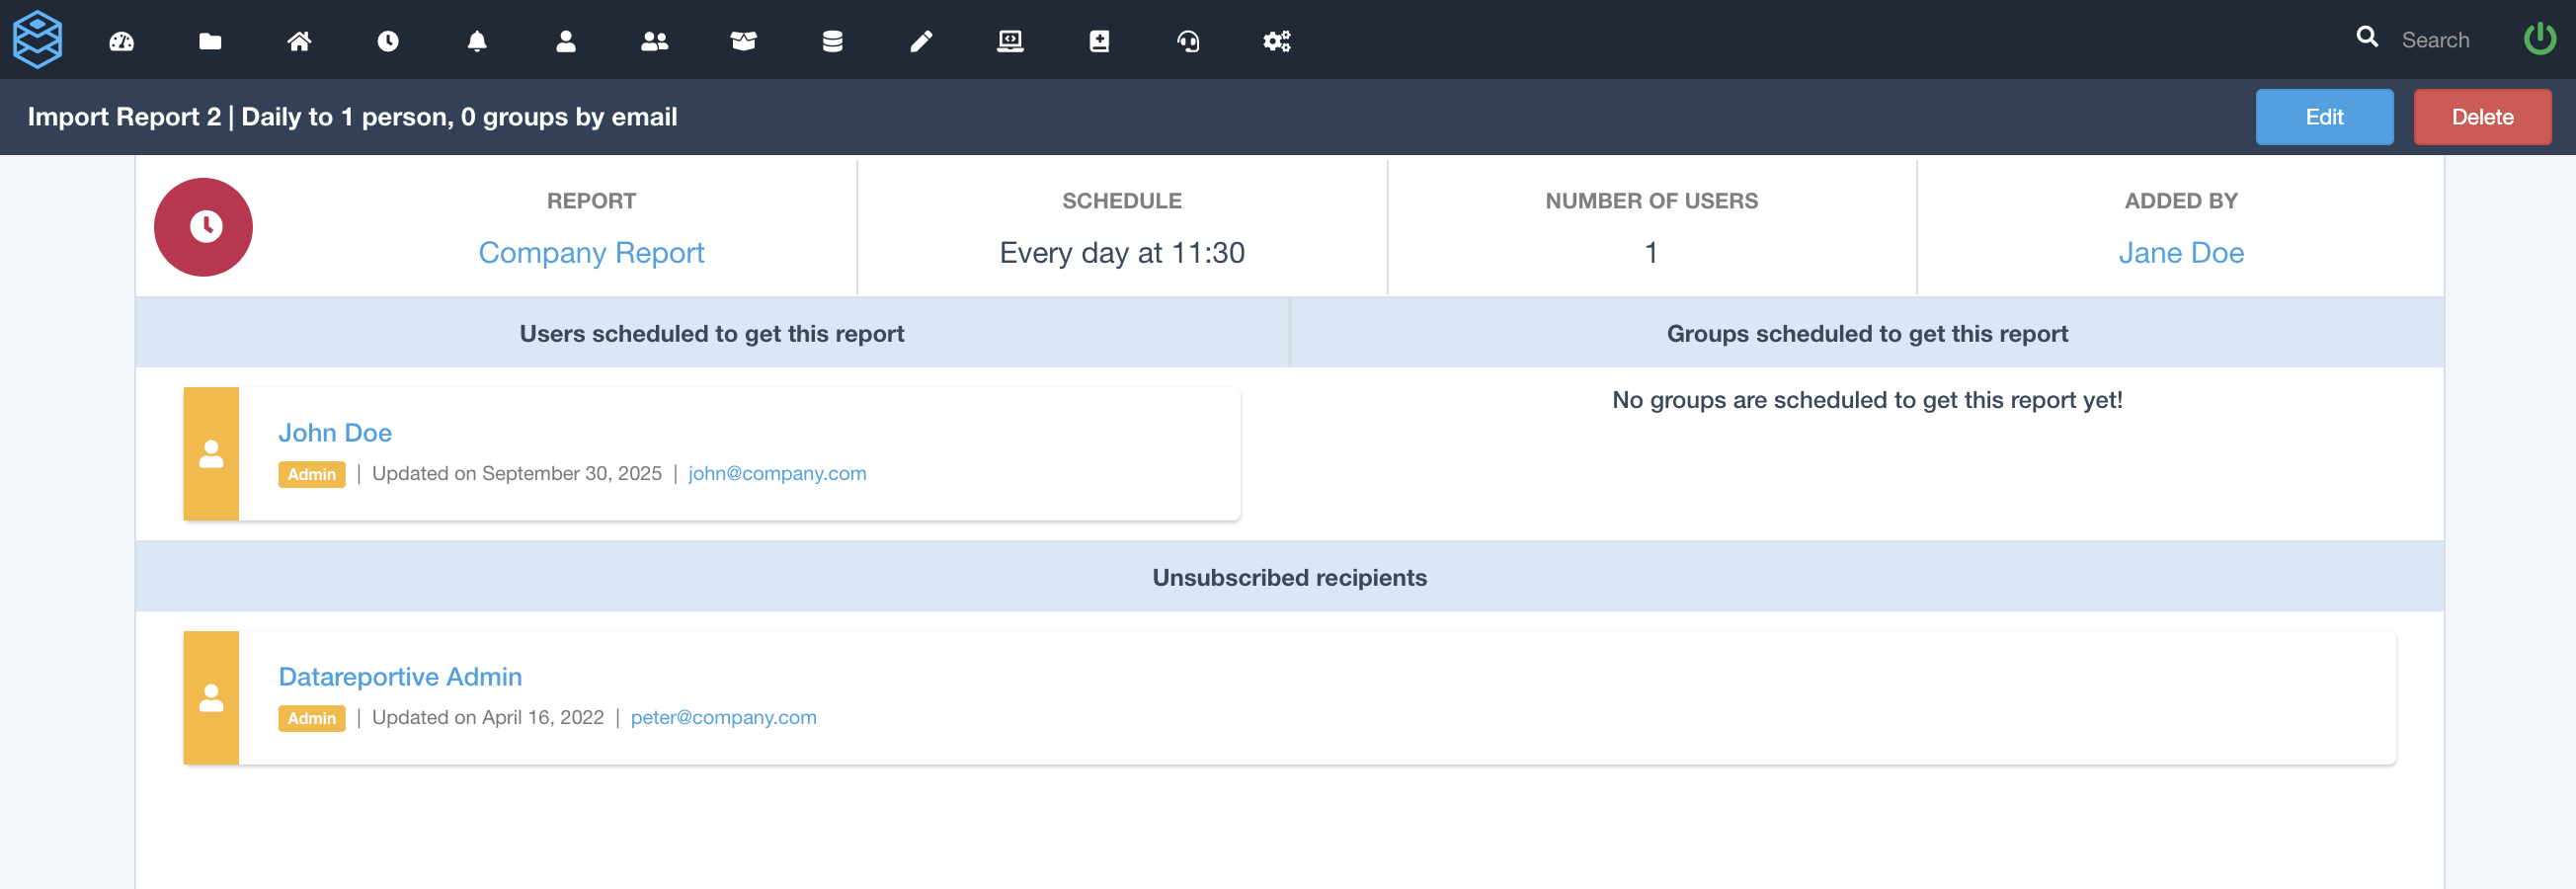
Removing someone from the unsubscribed list does not automatically add them back to the schedule, so add them again under users or groups if they should receive mail. If they were on the schedule through a group, unsubscribing only excludes them from this schedule, and they stay in the group.
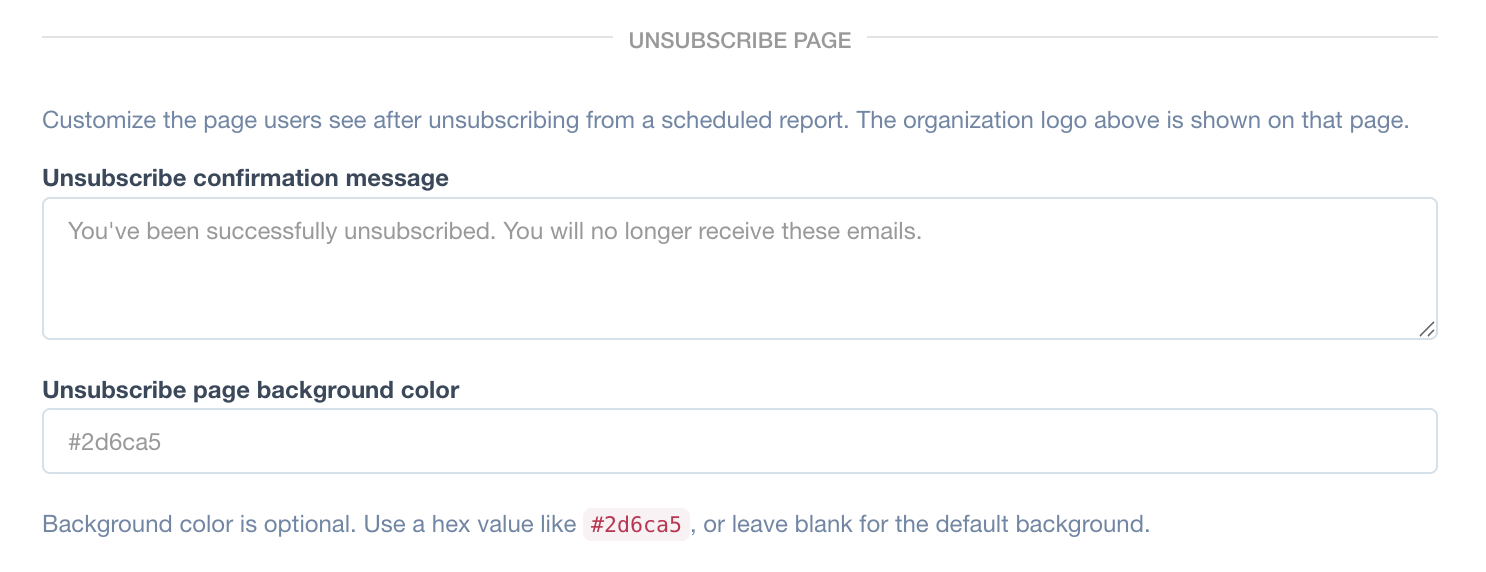
Customise the confirmation page
Go to Settings, scroll to Unsubscribe page, and set an optional confirmation message and background colour, for example #2d6ca5. Save, and your organisation logo from Settings is shown on the page.
Tips
- Put the link in a footer so it is easy to find without distracting from the main content.
- Use clear link text. "Unsubscribe" or "Opt out" reads better than a bare URL.
- Test with two accounts: unsubscribe with one and confirm the other still receives the send.
Frequently asked questions
Does this stop all emails from DataReportive?
No. It only stops the schedule whose link was clicked. Every other schedule the recipient is on is unaffected.
Can recipients re-subscribe themselves?
No. An admin removes them from the unsubscribed list and adds them back as a recipient.
Does this work for Slack schedules?
No. Unsubscribe links are for email schedules only.
What happens if I forget to add the placeholder?
Nothing breaks. If unsubscribe is off, any [[Unsubscribe]] placeholder is stripped before the email is sent.
Log into your DataReportive account and try it.